START TO FINISH : NO DRAMA! ALL FUN!
THE INTRO: When I first met John Trabbic (The creator of MiddleMost Post) for lunch in Burbank, there was an instant rapport. It turns out we had a ton of stuff in common… where we’re from, experiences growing up, life in the animation industry, etc. The incredible thing about John is that he’s got this aura about him when he talks about MiddleMost Post. He’s completely sincere and excited, and that draws you in and makes you want to be a part of it. By the time John showed me the sample animation of Parker J. Cloud (The show’s main character) I was hooked… even before he told me that he wanted to make the MiddleMost Post boat so there would be stop-motion elements to the show.
The completed Boat for MiddleMost Post. Scroll down for more in-progress pictures and words.

INITIAL THOUGHTS:
When the time came to start working, and I got my hands on the MiddleMost Post boat designs, all I could think about was that this thing LOOKS INCREDIBLE…AND ITS SO CARTOONY!!! Typically, studio and client notes tend to push things into a safe space, relying on kit-bashing models for something realistic, or going with a rather simple design scheme. Getting the chance to work on the MiddleMost Post boat was an opportunity to push the boundaries, technically and proportionally. A total dream come true moment. On top of that, the crews at Nickelodeon and Apt D trusted me completely to build the boat with no oversight. That kind of blind confidence is rare, but freeing. I was carefree during the build, and because of that, some of my best work came out.
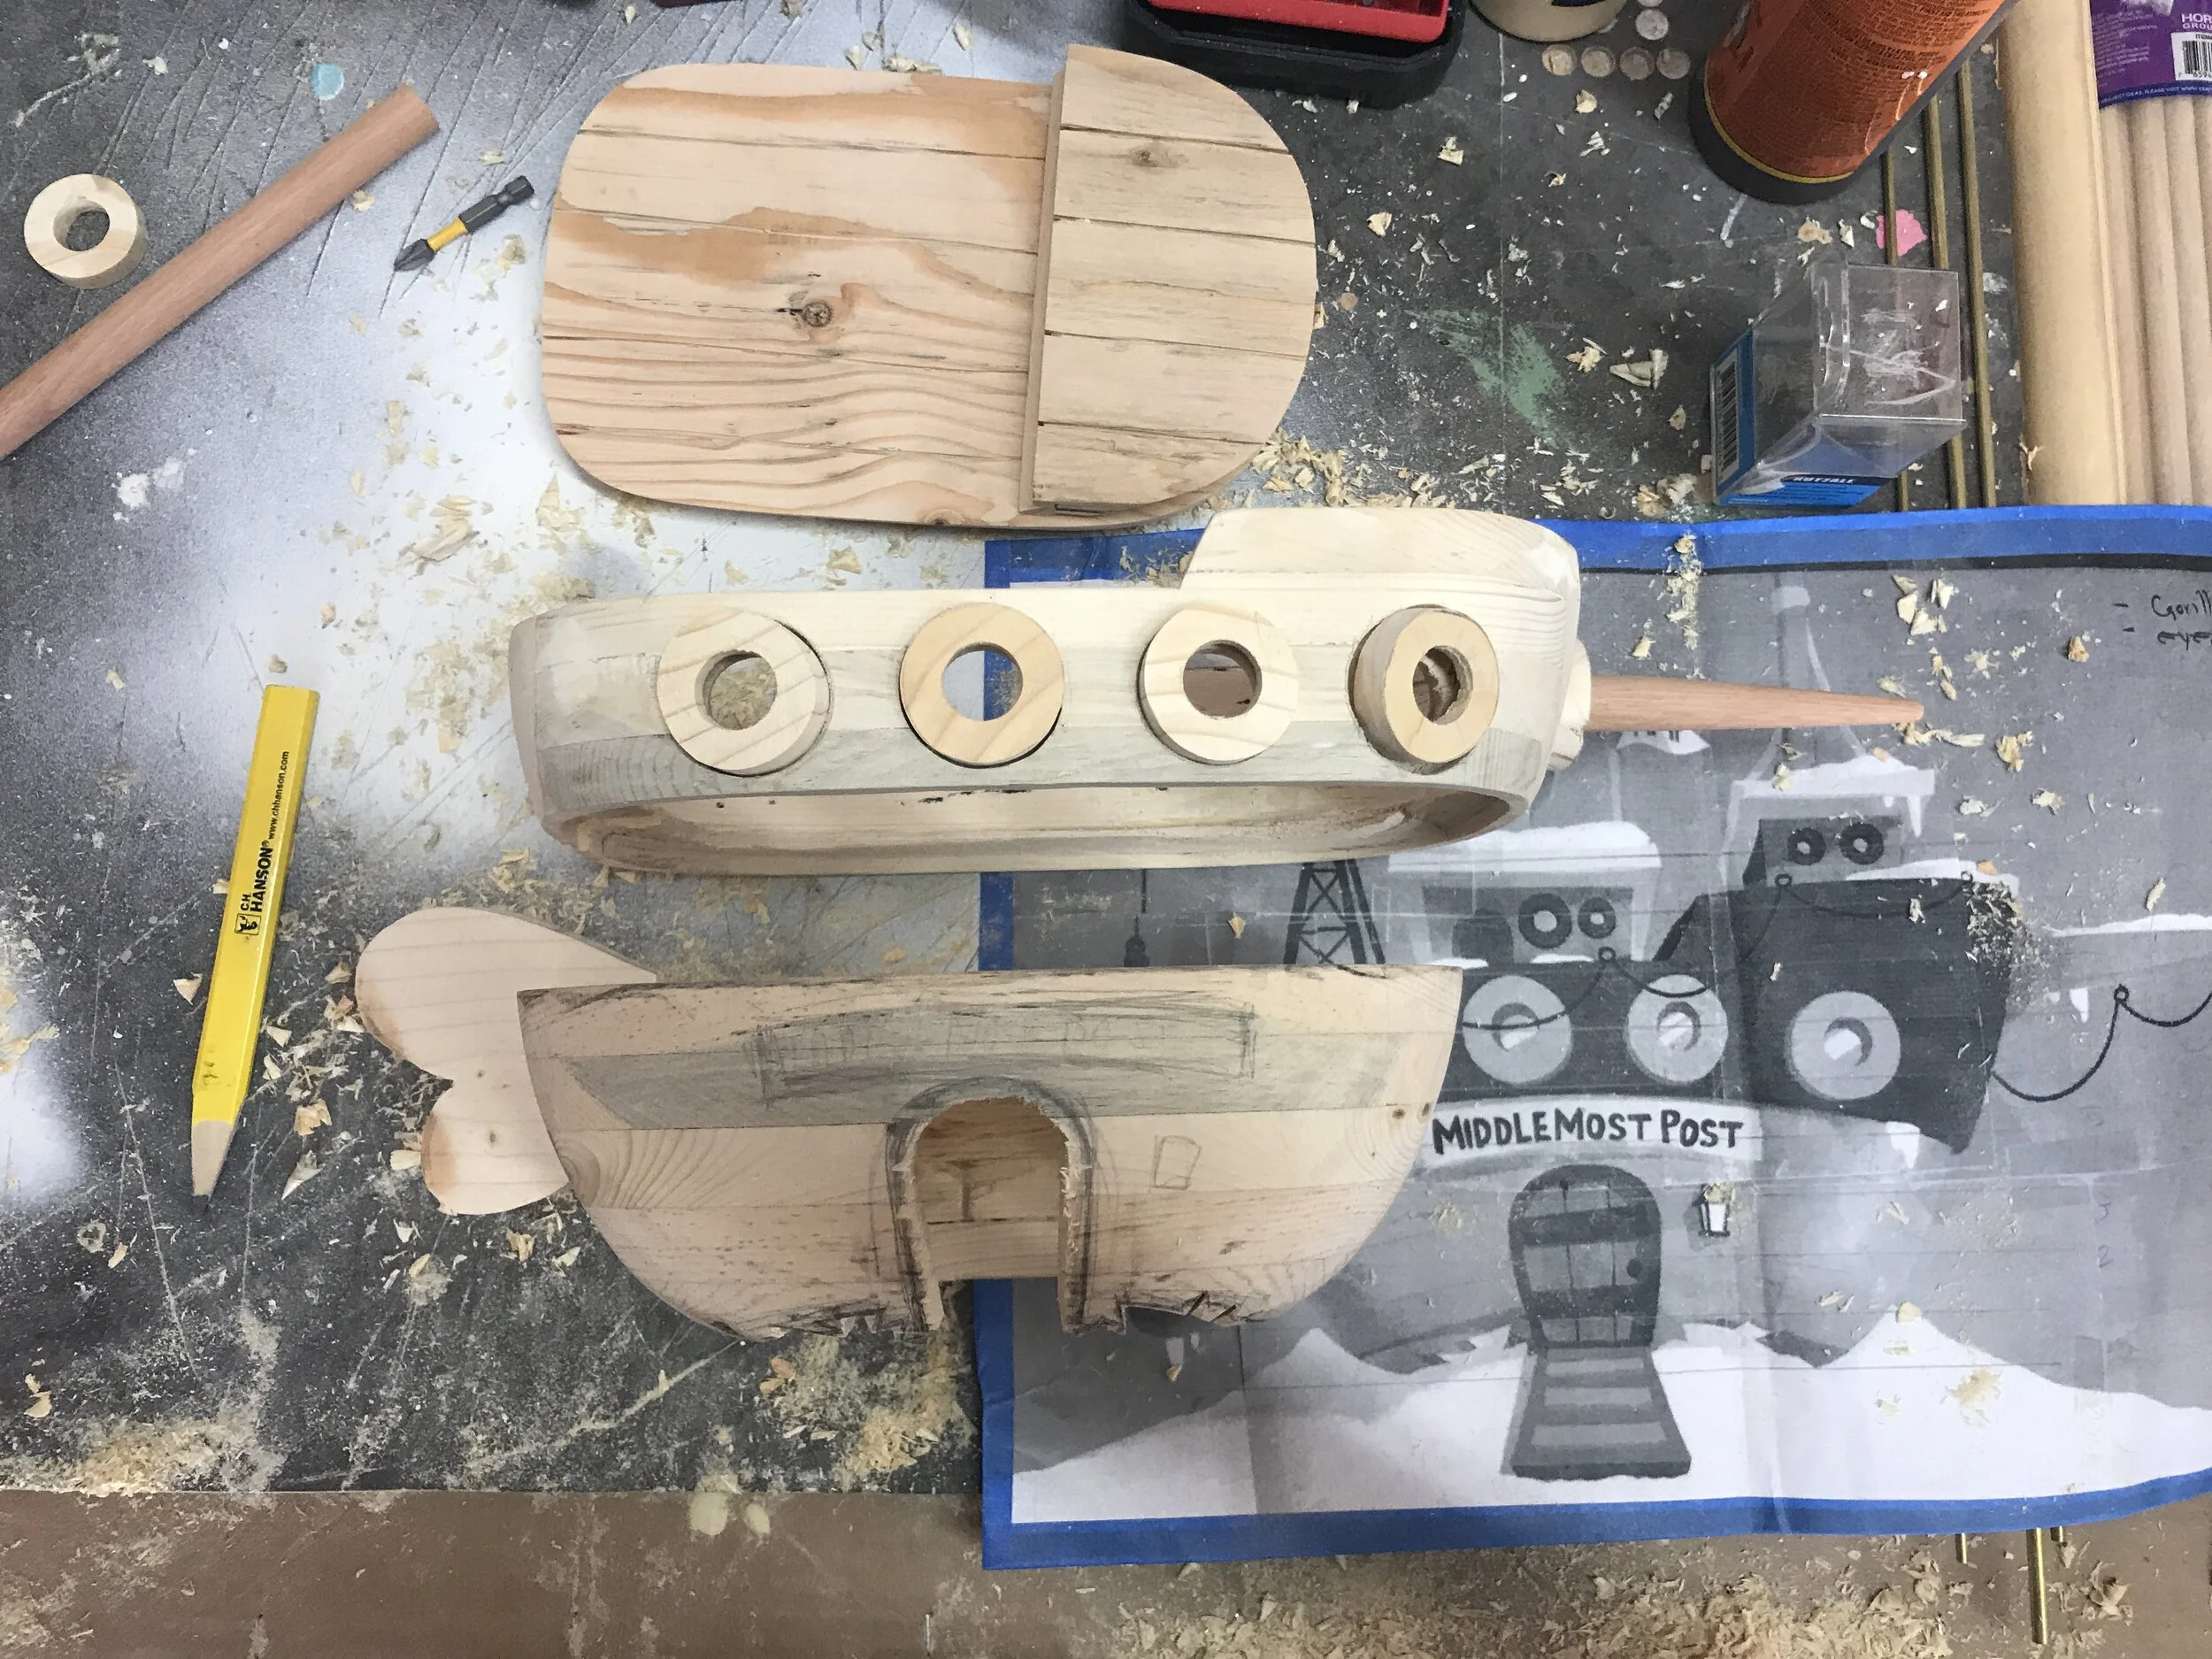
To build up the hull and deck, I used 1x3 pine strips. If you know where to look, you can find some that are dry and light, making for really great carving material. When I started out, there was actually a 2nd design for the boat that had the horizontal lines level. I was working from that to start, but then kept looking at the 2D stuff, and pushed to build the boat in that style. See the image below for reference. After getting the OK, all I had to do was add some extra material to the top and bottom, and reposition the port holes.


I love this image because it gives you a sense of scale for how big the boat really is. That, and I get to show off my rubber ducky socks. Ha.

Beginning the painting process. This was a little bit of a challenge because I wanted to make sure I nailed the reference, and in doing so, I was trying to forge similar brush strokes.


